Hey everyone!
Yes, I realise this post is waaayyy later than it should be, but I do have an excuse. My Valentines Day didn’t turn out to be what I hoped it would, and after I had done my nails I suddenly became very single again. So, as you can imagine, I didn’t want to even think about Valentines Day, and even ended up spending the day in my pyjamas, playing The Sims 2 all day 😀
So, now that I’ve recovered and I’m getting on with life, I have a Valentines Day look for you which you could definitely use at any time of the year.
WHAT YOU WILL NEED:

As always you need a base coat and a top coat. You’ll also need a pink polish for your French tip. I also used a sheer pink as a base colour, but this is optional.
You’ll also need a red and white stamping polish and stamping plates and tools (which aren’t pictured here, oops!). I also used little guide stickers for my French tips, but if you have a steady hand you can skip using these and just free hand it.
HOW DID I DO IT?
First up, prep your nails by cleaning and filing to your desired shape. Then add your base coat to protect your natural nail.

The next step is optional, but I think it gives the design a more professional look. Use a sheer French pink polish on all of your nails as a base colour. You can hardly see the difference, but I’ll post a picture anyway 🙂

Now we can do our pink French tips. I use these guide stickers, but as I mentioned before, if you have a steady hand then you can skip using these.

Once you’ve placed your stickers where you want them, go ahead and paint the tip of your nail with a pink polish.

I did two coats of the pink before removing the stickers.


Now it’s time for our stamping! The stamping plate I’m using has a cute kiss shape on it…

I got this plate from the BornPretty Store. I didn’t want the writing underneath, so I just placed the polish on the kiss. Using a white stamping polish, place some kisses randomly over your nails.

Then do the same thing with a red stamping polish.

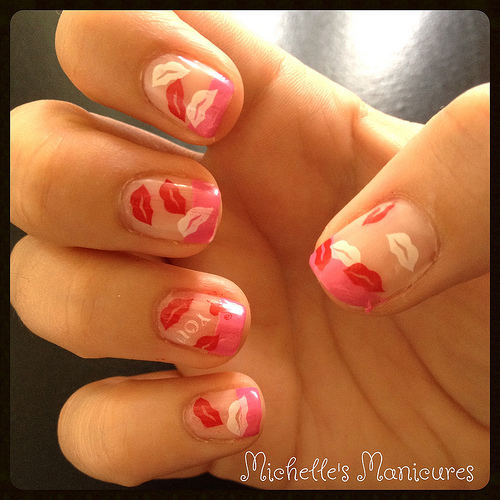
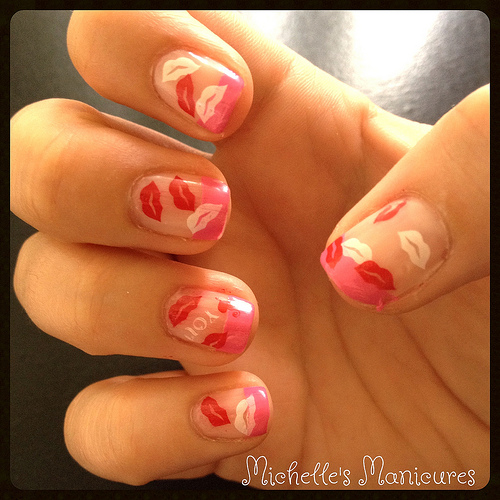
I alternated using the red and white stamping polishes so I could get the kisses of different colours overlapping each other. Your finished look should look something like this…

There is no right or wrong way to do this design. I was originally going to go for a neat organised look, but kisses just look so much better when they are random and all over the place, don’t you think?!
You could also add something different. On my other nail I used this stamping plate…

It’s hard to see, but the pattern says I ❤ You. I really wanted the heart to be red and the writing white, and this took me 3 goes to get it right! So, I only did it once!
Finish your design with a top coat, and that’s it!
If you don’t have stamping plates, you could easily replace the kisses with hearts hand drawn using a dotting tool, or even decal stickers which you can find in so many places.
Thanks for checking out my blog!!
Love from Michelle xox
Disclaimer: All products used in this blog were purchased by me with my own money. I am not affiliated with any of the companies mentioned nor am I getting paid to use the products. All opinions are 100% my own.
